After setting up a WordPress site and connecting tools like Google Search Console and Google Analytics, most people run into the same issue: everything is working, but the data is scattered.
You end up logging into multiple dashboards just to check traffic, indexing status, or performance scores. It works, but it’s inefficient—especially when you’re still building and refining a site.
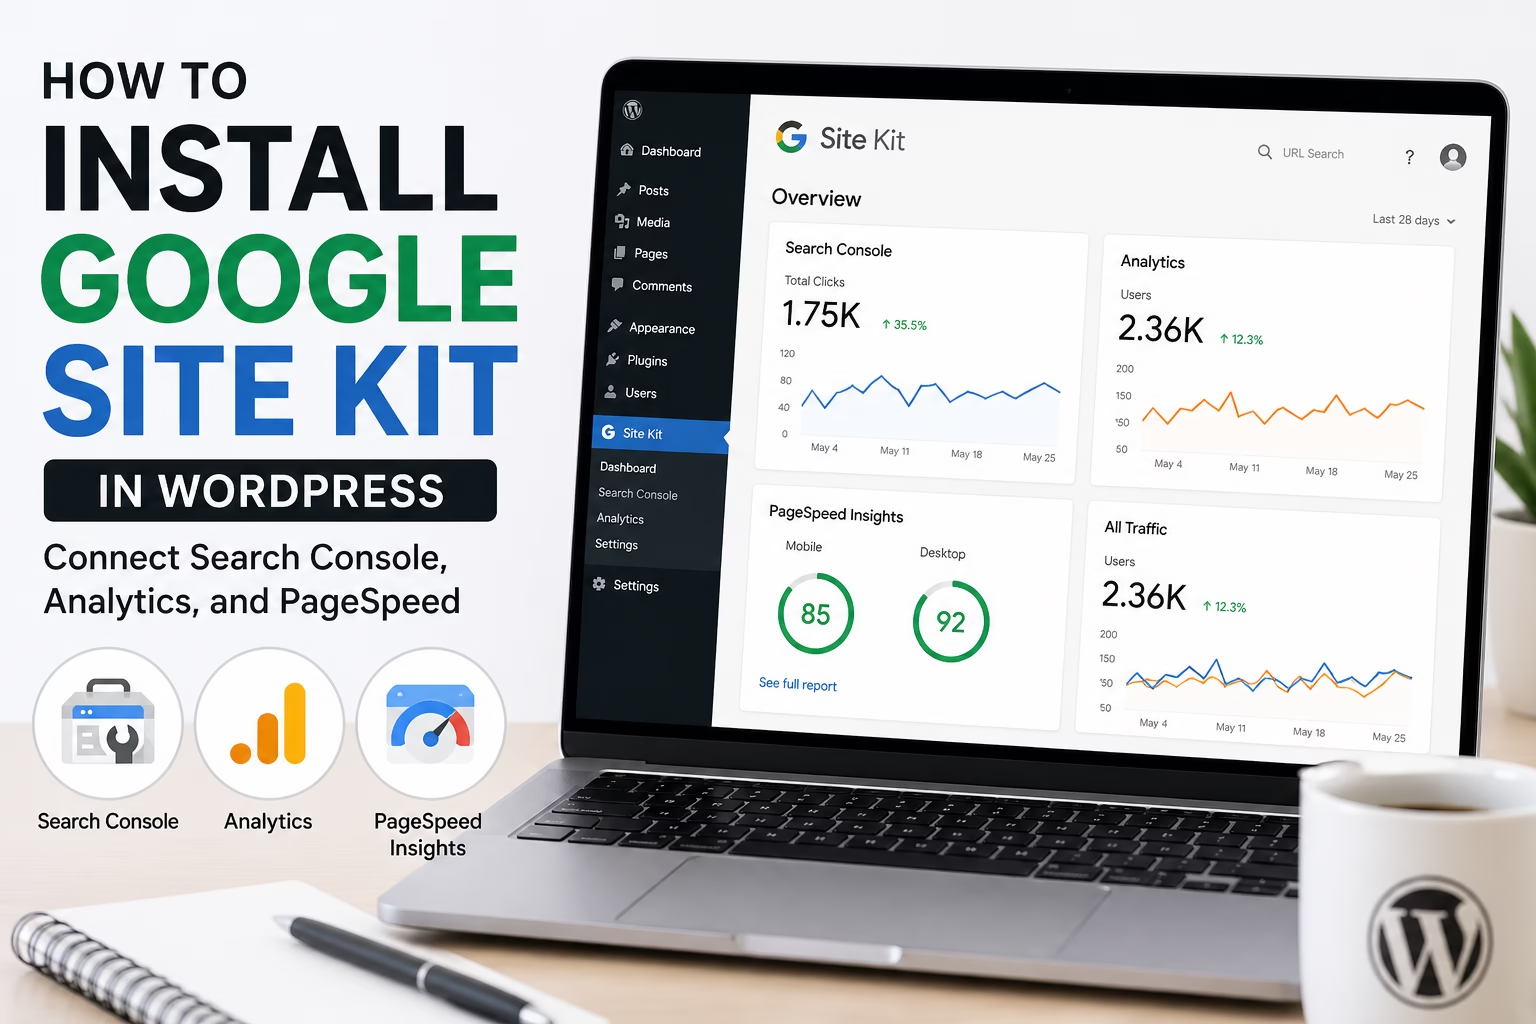
On most sites I build, I want a quick way to see key data directly inside WordPress without switching between tabs. That’s where Google Site Kit becomes useful. It pulls data from multiple Google services into your dashboard so you can monitor performance while working on your site.
Quick Answer / Summary
To install Google Site Kit in WordPress:
- Go to Plugins → Add New
- Search for Google Site Kit
- Click Install Now, then Activate
- Click Start Setup
- Sign in with your Google account
- Connect Search Console, Analytics, and other services
Once set up, Site Kit adds a dashboard inside WordPress showing traffic, search performance, and site speed data.
Why This Matters
When you’re building or improving a site, you need quick feedback.
Instead of guessing whether your changes are working, Site Kit lets you:
- See how Google views your site
- Monitor traffic without leaving WordPress
- Check performance issues early
- Confirm that tracking is set up correctly
In my experience, beginners often install Analytics and Search Console but don’t check them regularly. Site Kit fixes that by putting the data where you’re already working.
Step-by-Step Instructions
1. Install the Google Site Kit Plugin
In your WordPress dashboard:
- Go to Plugins → Add New
- Search for “Site Kit by Google”
- Click Install Now
- Click Activate
This is the official Google Site Kit plugin, so you don’t need to worry about compatibility or updates.
2. Start the Setup Process
After activation:
- Click Start Setup
- You’ll be redirected to sign in with Google
Use the same Google account you plan to use for Search Console and Analytics. Keeping everything under one account avoids connection issues later.
3. Verify Your Website
Site Kit will automatically handle verification with Google Search Console.
- Click Verify
- Confirm ownership when prompted
If you’ve already set up Search Console, it will detect your property. If not, it will create one for you.
4. Connect Google Search Console
Once verified:
- Site Kit connects to Search Console automatically
- You’ll start seeing data like:
- Search queries
- Clicks and impressions
- Indexing status
This is usually the first data source I check when reviewing a new site.
5. Connect Google Analytics
Next, connect Analytics:
- Click Set up Analytics
- Choose your existing Analytics account (or create one)
- Select the correct property
- Confirm the connection
Site Kit will add the tracking code automatically, so you don’t need to install anything manually.
6. Connect Additional Services (Optional)
You can also connect:
- PageSpeed Insights (site performance)
- AdSense (if you monetize)
- Tag Manager (advanced tracking)
You don’t have to enable everything immediately. I usually start with Search Console and Analytics, then add others later if needed. If you eventually need more advanced tracking control, event tracking, or centralized script management, see How to Add Google Tag Manager to WordPress for Beginners.
7. Review the Site Kit Dashboard
After setup:
- Go to Site Kit → Dashboard
You’ll see:
- Traffic overview
- Top search queries
- Page performance
- Speed insights
This becomes your quick check-in area when working on your site.
Practical Tips or Observations
1. Use one Google account for everything
Mixing accounts is one of the most common setup problems. Keep Search Console, Analytics, and Site Kit under the same login.
2. Give data time to appear
Analytics data can take 24–48 hours to show. Search Console may take a few days to populate.
3. Check Site Kit after publishing new content
When I publish new pages, I often check Site Kit later to see if impressions start appearing. It’s a quick way to confirm Google has picked up the page.
4. Don’t rely only on the dashboard
Site Kit is convenient, but it’s a summary. For deeper analysis, you’ll still want to open full Analytics or Search Console occasionally.
5. Keep the plugin updated
Since it connects multiple services, updates often include fixes and improvements. Don’t ignore them.
Common Mistakes
Installing multiple tracking plugins
You only need one method for Analytics tracking. If Site Kit is installed, avoid adding separate tracking plugins unless you know why.
Skipping Search Console setup
Some users only connect Analytics. Search Console is just as important because it shows how your site appears in search results.
Using the wrong Analytics property
If you select the wrong property during setup, your data won’t match your site. Double-check the domain.
Expecting instant insights
New sites don’t have much data yet. Site Kit works best once your site starts getting traffic.
Ignoring performance data
PageSpeed Insights inside Site Kit is useful. If it shows issues, it’s worth addressing them early rather than later.
When to Use This vs Alternatives
Use Google Site Kit if:
- You want a simple, integrated setup
- You prefer seeing data inside WordPress
- You’re building a new site and want everything connected quickly
Use separate tools if:
- You need advanced Analytics configuration
- You manage multiple complex tracking setups
- You prefer working directly in Google dashboards
In most beginner and intermediate setups, I usually recommend starting with Site Kit and only switching to more advanced tools if needed later. If you prefer a leaner setup with no plugin dependency, you can add GA4 to WordPress manually using the gtag.js snippet.
Conclusion
Google Site Kit gives you a straightforward way to connect Search Console, Analytics, and performance data directly to your WordPress dashboard.
Instead of switching between tools, you can monitor your site while you’re building and improving it. It doesn’t replace the full Google platforms, but it makes day-to-day checks faster and more practical.
For most new WordPress sites, it’s one of the simplest ways to confirm everything is connected and working correctly.

Etienne Basson works with website systems, SEO-driven site architecture, and technical implementation. He writes practical guides on building, structuring, and optimizing websites for long-term growth.