After setting up a Privacy Policy and Cookie Policy page, most people assume they’re done with compliance. But when you actually load the site in a browser, something is missing: there’s no visible notice about cookies at all.
This is one of the most common gaps I see when reviewing new WordPress sites. The pages exist, but there’s no cookie consent banner, which means visitors aren’t being informed or given a choice. On top of that, tools like analytics, embedded content, or marketing scripts may already be running in the background.
If your site uses cookies (and most do), you need a banner that informs users and, in many cases, blocks non-essential cookies until consent is given.
Quick Answer / Summary
To add a cookie consent banner in WordPress, install a cookie consent plugin, configure it to display a banner, connect it to your Cookie Policy page, and (if required) enable cookie blocking until consent is given.
Why This Matters
A cookie banner isn’t just a visual element—it controls how your site handles user data.
Without a proper banner:
- Visitors aren’t informed about tracking
- Analytics and marketing tools may load without consent
- You risk non-compliance with regulations like GDPR
In most sites I build, the banner is part of the final setup stage, right after policies are created and before the site goes fully live.
Step-by-Step: Add a Cookie Consent Banner in WordPress
Step 1: Install a Cookie Consent Plugin
Go to your WordPress dashboard:
- Navigate to Plugins → Add New
- Search for a cookie consent plugin
Common options include:
- Complianz
- CookieYes
- GDPR Cookie Consent
Install and activate one plugin.
Why this matters:
WordPress doesn’t include cookie consent functionality by default, so you need a plugin to manage both the banner and consent logic.
Step 2: Run the Setup Wizard (If Available)
Most cookie plugins include a setup wizard.
This usually asks:
- Your region (EU, US, etc.)
- Whether your site uses analytics
- Whether you use marketing cookies
- Your existing policy pages
Answer these based on your actual setup.
In my experience, this step saves time because it pre-configures the banner correctly instead of forcing you to adjust everything manually later.
Step 3: Connect Your Cookie Policy Page
Make sure the plugin links to your Cookie Policy page.
- Select your existing Cookie Policy page (you already created this earlier)
- Confirm the URL is correct
Why this matters:
The banner should always include a link where users can read full details about cookies.
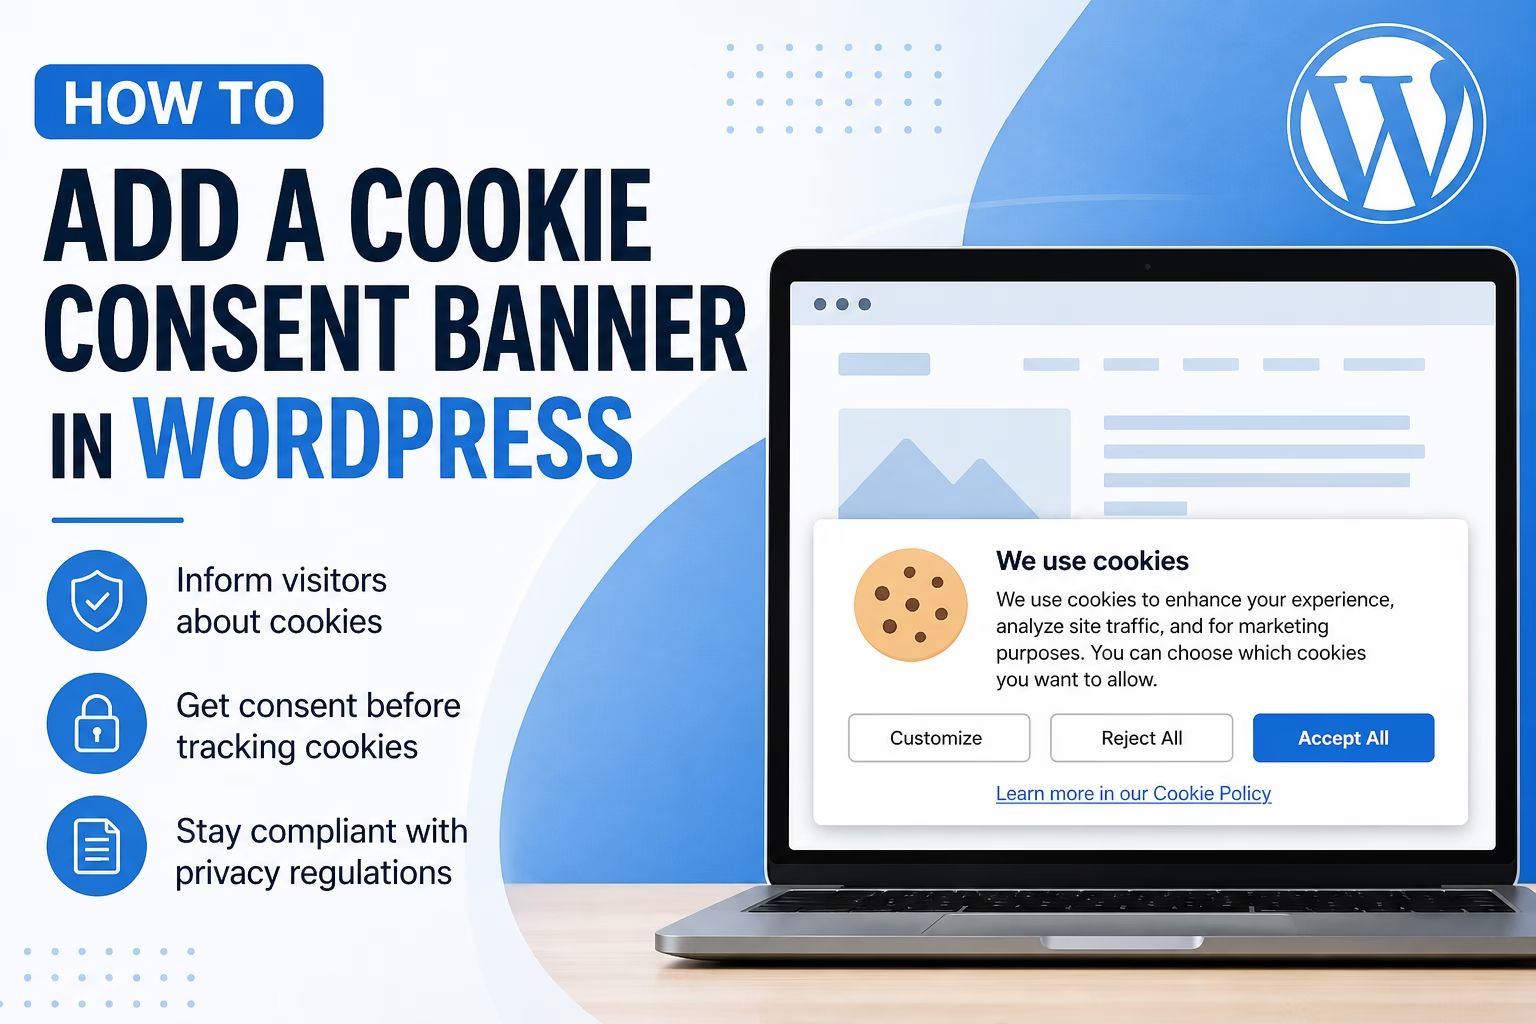
Step 4: Configure the Banner Display
Go to the plugin’s settings and adjust:
- Banner position (bottom or top)
- Layout (bar, popup, or box)
- Button options (Accept, Reject, Settings)
Recommended setup:
- Include both Accept and Reject options
- Add a Settings button if available
- Keep the design simple and readable
When I set this up on WordPress sites, I usually keep the banner minimal so it doesn’t distract from the content but is still clearly visible.
Step 5: Enable Cookie Blocking (Important)
This is the step many people skip.
Look for a setting like:
- “Block cookies before consent”
- “Prior consent required”
- “Script blocking”
Enable it.
Why this matters:
Without this, tracking tools like Google Analytics may load before the user gives consent, which defeats the purpose of the banner.
Step 6: Configure Cookie Categories
Most plugins let you group cookies into categories:
- Necessary (always active)
- Analytics
- Marketing
- Preferences
Set them up based on your site.
Example:
- Necessary → WordPress core cookies
- Analytics → Google Analytics
- Marketing → Ads or tracking pixels
This allows users to control what they accept.
Step 7: Customize the Message
Edit the banner text so it’s clear and direct.
Example structure:
- Short explanation of cookie use
- Link to policy
- Clear action buttons
Avoid overly technical language. Keep it readable.
Step 8: Test the Banner
Open your site in:
- Incognito/private mode
- A different browser
Check:
- Does the banner appear?
- Do buttons work?
- Are cookies blocked before consent?
- Does the policy link open correctly?
Testing is important because many issues only show up on first visit.
Practical Tips and Observations
- In most sites I build, the banner appears at the bottom of the screen to avoid interrupting the user immediately.
- Keep the number of buttons simple—too many options can reduce interaction.
- If you use Google Site Kit or analytics tools, double-check they are actually blocked before consent.
- Some plugins auto-detect cookies, but I still review them manually to avoid missing anything.
Common Mistakes
1. Adding a banner without blocking cookies
This is the most common issue. The banner shows, but tracking still runs immediately.
2. Not linking to the Cookie Policy page
The banner should always include a working link.
3. Using only an “Accept” button
In many regions, users must have a real choice (Accept / Reject).
4. Overcomplicated banner design
Large popups or aggressive overlays can hurt usability.
5. Forgetting to test
What works in the admin view may not work for real visitors.
When to Use This vs Alternatives
A plugin-based cookie banner is the best option for most WordPress sites.
However:
- If you run a very simple site with no tracking tools, you may only need a basic notice.
- If you run ads or advanced tracking, you may need a more advanced consent management platform (CMP).
- Some themes or page builders include built-in banners, but they usually lack proper blocking features.
In most cases, I recommend using a dedicated plugin because it handles both display and compliance logic properly.
Conclusion
Adding a cookie consent banner is the step that turns your policy pages into something functional.
Install a plugin, connect your policy page, enable cookie blocking, and test everything. Once it’s set up correctly, it runs in the background and keeps your site aligned with how cookies should be handled.

Etienne Basson works with website systems, SEO-driven site architecture, and technical implementation. He writes practical guides on building, structuring, and optimizing websites for long-term growth.