Refunds and returns are one of the first things customers look for before buying from a new online store. Even if your products are excellent, shoppers still want to know what happens if something arrives damaged, doesn’t fit, or simply isn’t what they expected.
I’ve seen many WooCommerce stores launch with payment gateways, shipping zones, and product pages fully configured, but no real return process in place. That usually leads to support emails, payment disputes, and frustrated customers. A simple refund and returns setup makes the store look more trustworthy and also saves time when handling customer issues later.
The good news is that WooCommerce already includes basic refund tools. Most beginners only need a clear return policy, proper order management, and a simple process customers can follow.
Quick Answer
To set up WooCommerce refunds and returns, you should:
- Create a clear return and refund policy page
- Add the policy to checkout and footer navigation
- Configure WooCommerce order management properly
- Learn how to issue manual or automatic refunds
- Define return conditions, timelines, and exceptions
- Make the process simple for customers to follow
For most small WooCommerce stores, this setup is enough to handle refunds professionally without extra plugins.
Why Refunds and Returns Matter
Customers are more likely to buy when they know there’s a clear process if something goes wrong. A confusing or missing refund policy creates hesitation, especially for first-time visitors.
Refunds also affect payment disputes and chargebacks. When customers can’t find instructions or don’t receive responses quickly, they often contact their payment provider instead. That can create additional fees and account issues.
In my experience, stores with a straightforward return process usually deal with fewer support problems because expectations are already clear before the purchase happens.
Refund policies also help with SEO and trust signals. Many ecommerce stores link their policy pages in the footer alongside shipping and contact information because users actively look for them.
Step 1: Create a Refund and Returns Policy Page
Before configuring anything in WooCommerce, create a dedicated policy page explaining how returns work.
Go to:
Pages → Add New
You can title the page something like:
- Refund Policy
- Returns and Refunds
- Returns Policy
Most stores should include:
- How long customers have to request a return
- Which products are eligible
- Product condition requirements
- Whether return shipping is covered
- How refunds are issued
- Processing times
- Exceptions or non-refundable items
A beginner-friendly structure usually works best. Avoid overly legal wording unless required for compliance in your region.
For example:
- Returns accepted within 30 days
- Items must be unused and in original packaging
- Digital downloads are non-refundable
- Refunds are processed to the original payment method
Once published, add the page to your footer menu so customers can easily find it.
This works well alongside your existing policy-related pages like Privacy Policy, Terms and Conditions, and Disclosure pages.
Step 2: Add the Policy to WooCommerce Checkout
Customers should see refund information before placing an order.
A common approach is:
- Add a link to the refund policy near checkout
- Mention return terms in checkout notes
- Include policy links in order emails
In most WooCommerce themes, you can place policy links in the footer automatically using menus or widget areas.
I usually recommend keeping the policy visible sitewide rather than hiding it inside account pages.
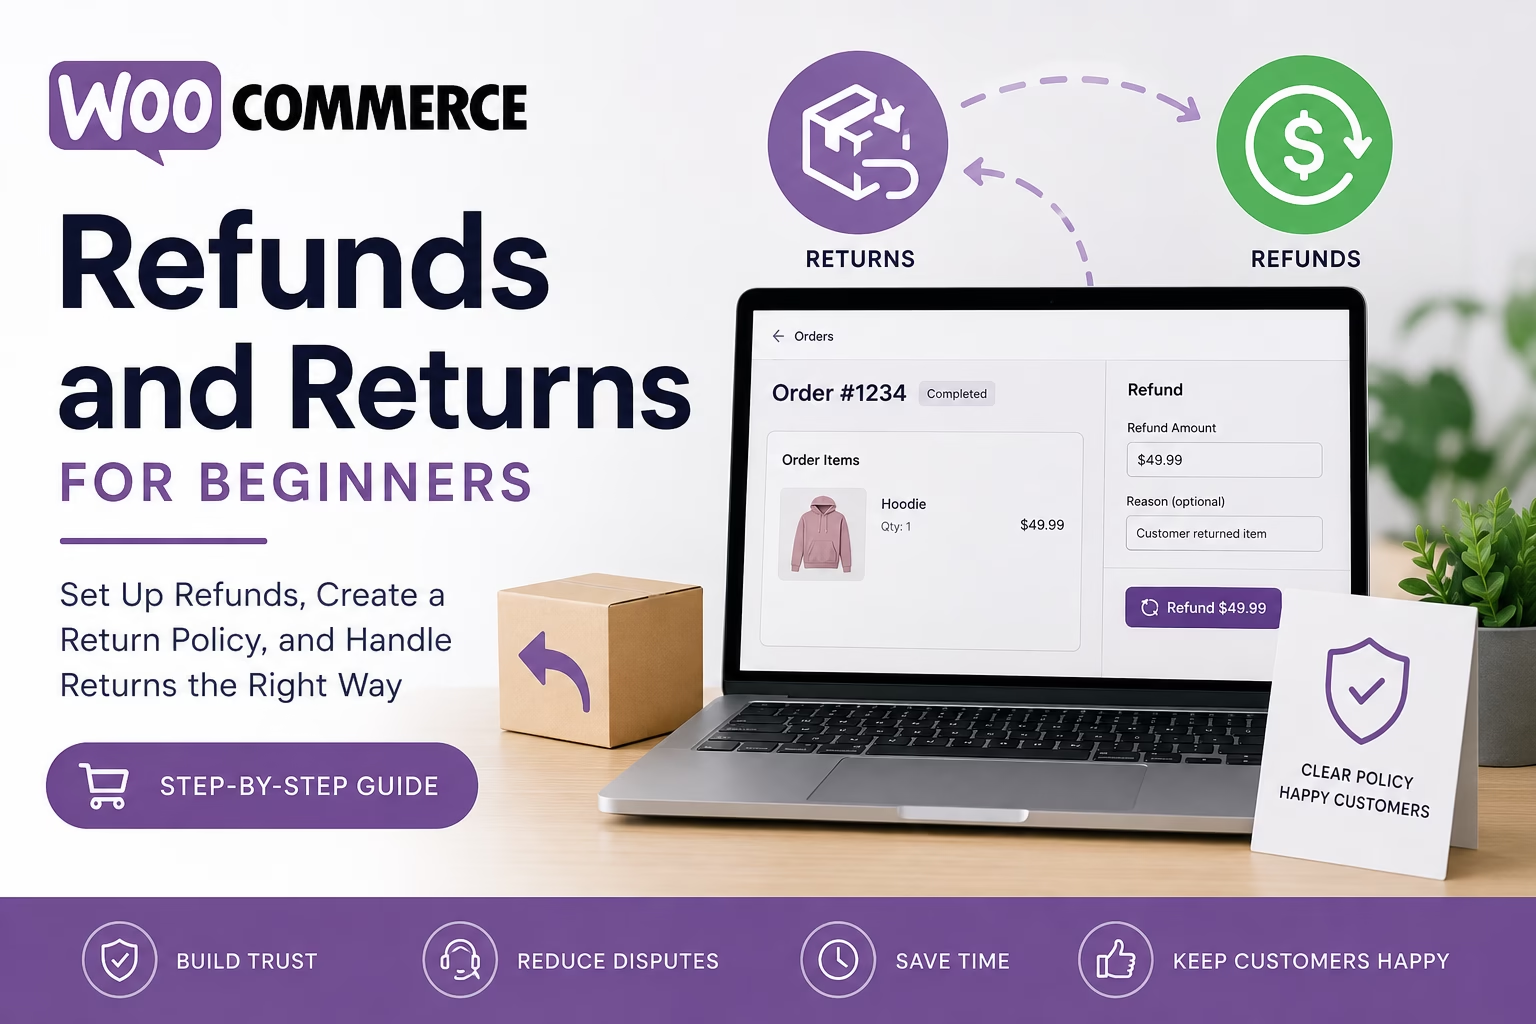
Step 3: Understand WooCommerce Refund Options
WooCommerce supports two main refund types, and the official WooCommerce refunds documentation explains how refunds work from the order screen:
Manual Refunds
A manual refund means you return the payment separately through Stripe, PayPal, or another payment processor, then update the WooCommerce order manually.
This is common when:
- Bank transfers were used
- Cash payments were accepted
- The gateway does not support automatic refunds
Automatic Refunds
Some payment gateways allow WooCommerce to process refunds directly from the order screen.
Popular gateways like Stripe and PayPal usually support this feature.
To issue a refund:
- Go to WooCommerce → Orders
- Open the order
- Click Refund
- Enter the amount
- Choose refund items if needed
- Click Refund via [Gateway]
WooCommerce will update the order status automatically if the gateway supports it.
Step 4: Configure Order Statuses Properly
WooCommerce order statuses help track where refunds and returns stand.
The most common statuses are:
- Processing
- Completed
- Refunded
- Cancelled
- Failed
When refunds are issued, WooCommerce marks the order as refunded automatically in many cases.
For physical products, I usually recommend waiting until returned items are received before processing the final refund unless the issue is obvious.
That reduces abuse and accidental refunds.
Step 5: Decide How Customers Request Returns
You need a consistent process customers can follow.
Most beginner WooCommerce stores use one of these methods:
Contact Form
Customers submit a return request using a form.
This is simple and works well for smaller stores.
Email Support
Customers email your support address with the order number and issue details.
Return Management Plugins
Larger stores sometimes use dedicated return merchandise authorization (RMA) plugins.
These are useful when handling high order volumes, exchanges, or approval workflows.
For most new stores, a contact form is usually enough.
Step 6: Set Rules for Different Product Types
Not all products should follow the same return rules.
Physical Products
These usually allow returns within a fixed timeframe.
Digital Products
Digital downloads are often non-refundable once accessed or downloaded.
Your policy should explain this clearly.
Customized Products
Personalized or made-to-order items commonly have stricter return limitations.
I frequently see beginners forget to mention this until problems happen later.
Practical Tips for WooCommerce Refunds
Keep Return Instructions Simple
Customers should immediately know:
- Where to contact you
- What information to provide
- How long the process takes
Complex instructions usually create more support requests.
Include Order Numbers in Requests
This speeds up support considerably.
Use Refund Reasons Internally
Even if customers don’t see them, tracking refund reasons helps identify recurring product or shipping issues.
Respond Quickly
Even if the refund is not approved yet, fast communication prevents disputes.
Test Refunds Before Launch
When I set this up on WooCommerce sites, I usually place a test order and issue a small refund to confirm the payment gateway works correctly.
This catches configuration issues early.
Common Refund and Return Mistakes
No Visible Refund Policy
Many stores have policies hidden or missing entirely.
Customers expect to find this information quickly.
Offering Unrealistic Return Windows
A very long return period can create inventory and abuse problems for smaller stores.
Forgetting Digital Product Rules
Digital items need separate wording in most stores.
Refunding Before Reviewing the Issue
Not every request should be automatically approved without verification.
Ignoring Shipping Costs
Decide early whether original shipping fees are refundable.
This should be clearly stated in the policy.
When to Use Plugins Instead
WooCommerce’s built-in refund system works well for many stores, but larger operations may need additional tools.
An RMA or returns plugin may help if you need:
- Customer return dashboards
- Automated approvals
- Printable return labels
- Exchange workflows
- Advanced inventory syncing
For most beginner WooCommerce stores, though, extra plugins are unnecessary at first. Simpler setups are easier to manage and usually create fewer problems.
Conclusion
A clear refund and returns setup makes a WooCommerce store look more trustworthy and professional. It also reduces confusion when customer issues happen later.
For most beginners, the best approach is simple:
- Create a clear policy page
- Add it to visible areas of the site
- Configure refunds inside WooCommerce
- Define consistent return rules
- Keep customer communication straightforward
Once the process is working smoothly, you can always expand it later with automation or dedicated returns tools.

Etienne Basson works with website systems, SEO-driven site architecture, and technical implementation. He writes practical guides on building, structuring, and optimizing websites for long-term growth.