A lot of websites reach a point where they are ready to take action from visitors, not just collect them. You might already have a service page, pricing page, or booking system in place, but there’s still a missing piece: getting paid.
On many WordPress sites I review, this step is either delayed or overcomplicated. People assume they need a full ecommerce store, when in reality they just need a simple way for someone to click a button and pay.
If you’re selling a service, offering a one-time product, or collecting deposits, a payment button is often the simplest and fastest solution.
Quick Answer / Summary
To add a payment button to a WordPress website, you can use a payment provider like PayPal or Stripe, create a payment link or button in their dashboard, and then embed it into your WordPress page using a block, shortcode, or HTML.
For most sites, the easiest method is:
- Create a payment link in Stripe or PayPal
- Copy the button or link
- Add it to your page using the WordPress block editor
No full ecommerce setup is required.
Why This Matters
A payment button removes friction.
Instead of asking users to contact you, wait for an invoice, or navigate multiple steps, you give them a clear next action. This is especially useful for:
- Service-based websites
- Freelancers and consultants
- Small businesses offering fixed packages
- Websites selling one or two products
In my experience, adding a simple payment option often increases conversions immediately because it matches the intent of visitors who are already ready to buy.
Step-by-Step Instructions
Step 1: Choose a Payment Provider
The most common options are:
- PayPal
- Stripe
Stripe is usually the better option if you want a clean, modern checkout experience. PayPal works well if your audience expects it. You can explore Stripe’s payment links feature here: Stripe Payment Links.
When I set this up on WordPress sites, I usually recommend Stripe unless there is a specific reason to use PayPal.
Step 2: Create a Payment Link or Button
In Stripe:
- Go to your Stripe dashboard
- Navigate to “Payment Links”
- Create a new product or service
- Set the price
- Generate the payment link
In PayPal:
- Go to PayPal Business account
- Create a “Pay Now” button
- Configure price and details
- Generate the button code or link
At this stage, you don’t need WordPress yet. You are just creating the payment endpoint.
Step 3: Copy the Payment Link or Embed Code
You will get either:
- A simple URL (payment link)
- Or HTML button code
Both work. A link is easier. A button looks more integrated.
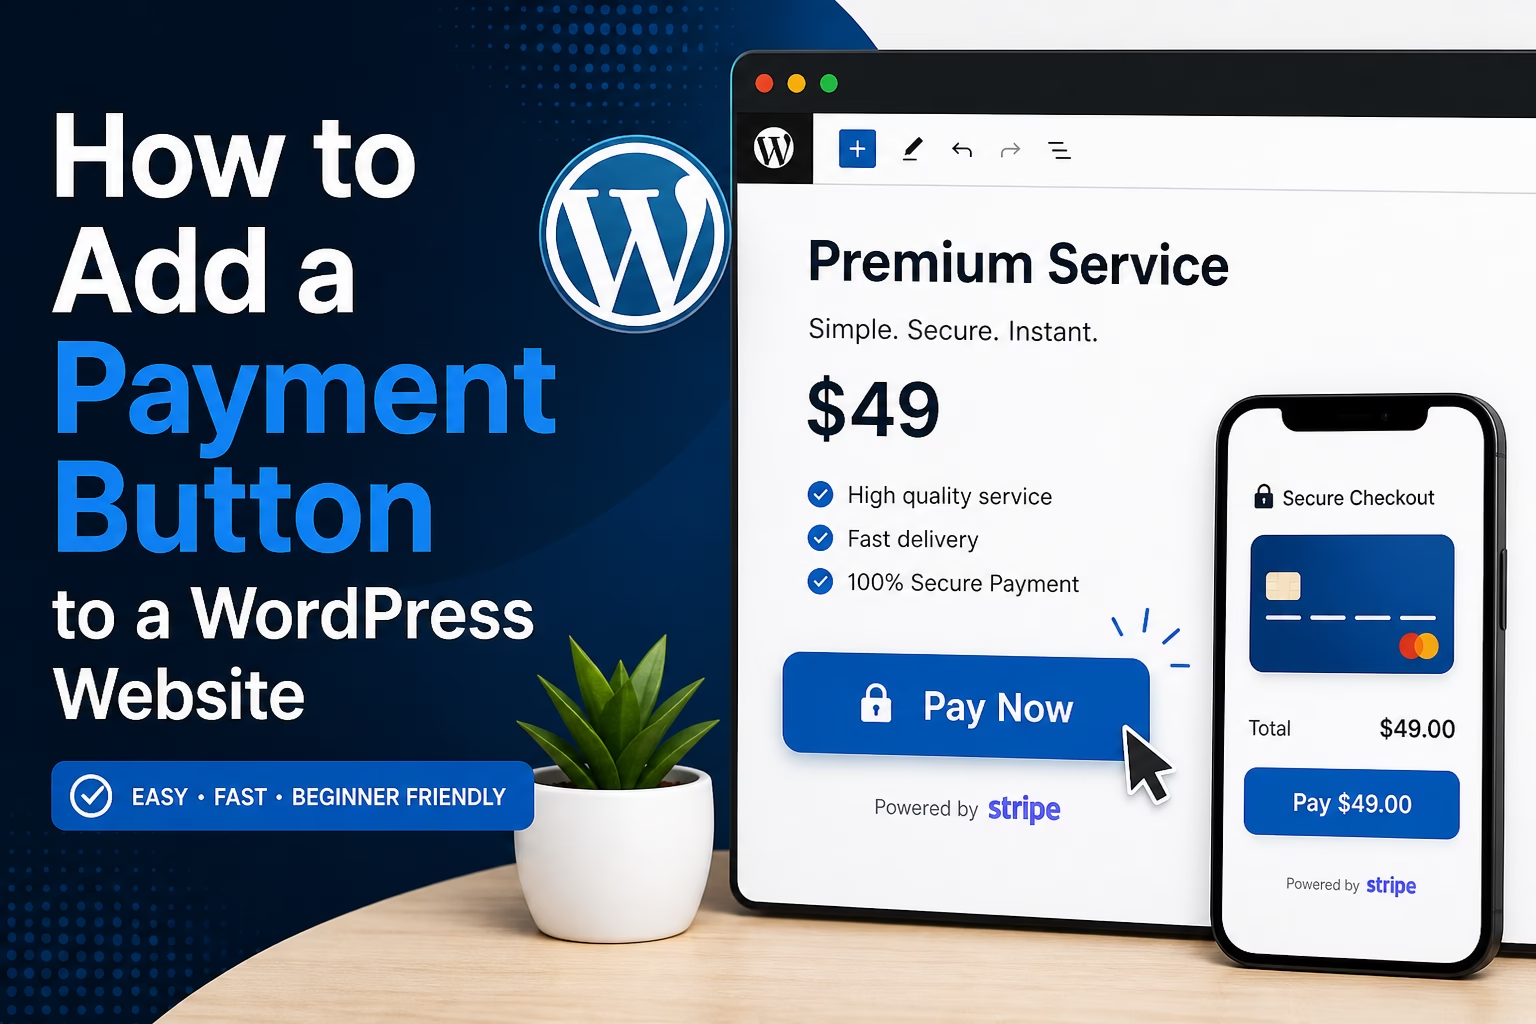
Step 4: Add the Payment Button in WordPress
Open the page where you want the payment option, such as a pricing page, service page, or landing page. If you have not built one yet, start with a focused WordPress landing page so the payment button has a clear purpose.
- Pricing page
- Service page
- Landing page
Option A: Using a Button Block (Recommended)
- Add a Button block in the WordPress editor
- Paste your payment link as the button URL
- Set text like “Pay Now” or “Buy Now”
This is the simplest and cleanest method.
Option B: Using Custom HTML
If you want to use the exact button from PayPal:
- Add a “Custom HTML” block
- Paste the button code
- Preview to confirm it displays correctly
Step 5: Test the Payment Flow
Before publishing:
- Click the button yourself
- Go through the payment process
- Check confirmation and emails
In most sites I build, I always test this at least twice. Small issues here can cost real revenue.
Step 6: Place the Button Strategically
Where you place the button matters as much as adding it.
Good placement options:
- At the end of a service page
- Below pricing sections
- After a strong call to action
- Inside landing pages
Avoid hiding it. If users are ready to pay, make it obvious.
Practical Tips or Observations
Keep it simple first. You don’t need a complex checkout system unless you are running a full store.
I usually recommend:
- One clear payment button per offer
- Consistent button text (“Buy Now”, “Pay Now”, “Get Started”)
- Matching the button to the page intent
Also, make sure your payment page reflects your branding. Stripe allows basic customization, which helps maintain trust.
If you already have a contact form, combining it with a payment button can work well. For example:
- User fills out form
- Then proceeds to payment
Common Mistakes
1. Overcomplicating with WooCommerce too early
Many sites install full ecommerce plugins when they only need a single payment option. This adds unnecessary complexity.
2. Not testing payments
A broken payment flow is one of the most expensive mistakes. Always test it.
3. Poor button placement
If users have to scroll too far or search for the payment option, conversions drop.
4. Unclear pricing before payment
Users should already understand what they are paying for before clicking the button.
5. No confirmation or follow-up process
After payment, make sure users know what happens next (email, service delivery, etc.).
When to Use This vs Alternatives
A payment button works best when:
- You sell a single service or fixed package
- You want a fast and simple setup
- You don’t need a full shopping cart
Consider other options if:
- You have multiple products → use WooCommerce
- You need subscriptions → use Stripe subscriptions or a membership plugin
- You require advanced checkout flows → use a dedicated ecommerce setup
If you start with a simple payment button but later need a full product catalog, cart, and checkout system, follow this step-by-step guide on how to create a WooCommerce store in WordPress.
In my experience, many sites can run effectively for a long time using just payment buttons before needing anything more complex.
If you want to go beyond one-off payments and build recurring income from your website, see the guide to creating a membership site in WordPress and setting up paid subscriber access to your content.
If you want to go beyond selling and give your audience a way to support your work directly, you can also accept donations on your WordPress site — a simpler option that requires no fixed price and works well alongside a standard payment button setup.
Conclusion
Adding a payment button to a WordPress site is one of the simplest ways to turn visitors into customers.
You don’t need a full ecommerce system to get started. A payment link, a well-placed button, and a tested checkout flow are enough for most service-based or small websites.
Once that is in place, you can refine placement, messaging, and design to improve conversions over time.

Etienne Basson works with website systems, SEO-driven site architecture, and technical implementation. He writes practical guides on building, structuring, and optimizing websites for long-term growth.